Character Creator 插件开发
最近在CC 4/iClone 8开发Python插件,真的是小刀拉屁股,开了眼了,都不知道该从哪里开始吐槽,如果说maya脚本开发叫恶心,CC脚本开发就是阴间
- 去年CC 4发布,改动了大量API,大部分API都变成Experimental API,之前(指五六年前)的样例代码大多失效,并不不再维护(不会改你可以不改)
- 官方文档简陋无比,大部分函数和参数没有用法和解释,写满了
# No example
- 给官方发邮件(这是花了钱的)问Python相关的东西,官方只会复读“脚本还在开发,可能有功能不全,你可以尝试去论坛问”
- 官方论文发言需要审核,我提了两个问题都被拒绝发布(我发邮件你让我去论坛,我去论坛你堵我嘴)
- 脚本功能不全,有些功能可以读写,有些是只读(像maya你的每一步操作都是由命令实现的,甚至会在窗口将当前命令输出出来)
介绍
Character Creator是reallusion推出的一款商业捏脸软件,可以制作表情动作、动作捕捉等。使用成本比较高,大部分公司都不会使用,网上的信息远少于Maya、3DMax这类DCC。

CC支持使用Python编写脚本、插件,可以通过顶部导航栏中Script--Load Python加载脚本,通过Script--Console Log 打开Log面板,不过这个Log面板远不如Maya的面板信息齐全。
iClone是该公司的另一款软件,用于制作动画,功能与CC十分接近,可以参考iClone的文档编写插件
环境配置
可以参考maya python脚本的环境配置,当时使用的是PyCharm,这里我们使用VS Code
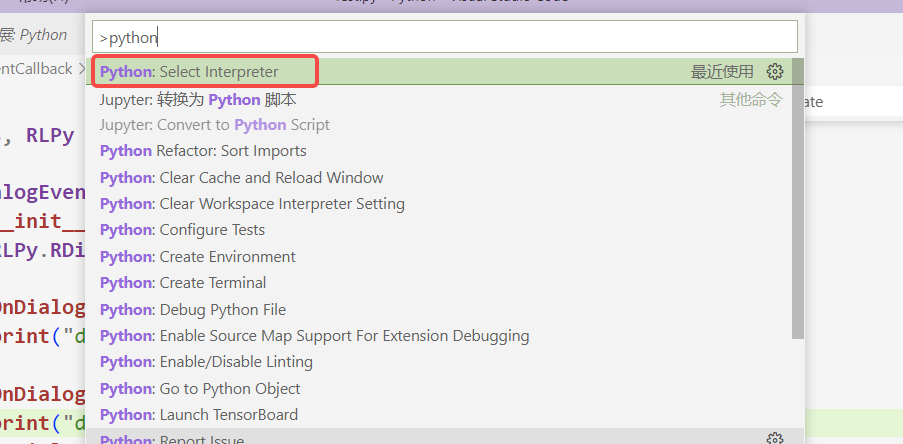
- VS Code安装Python插件

- 选择Python解释器(按
ctrl+shift+p打开命令界面)


编写脚本
脚本本身不难写,主要是文档和论坛信息太少,某些API的使用可以参考iClone的文档,下面是我认为值得处理的东西
创建带有按钮的窗口
加载脚本后会出现一个对话框,对话框中有一个Label和一个按钮,当按按钮时可以输出”Hello World“
import RLPy
from shiboken2 import wrapInstance
from PySide2 import QtWidgets
def run():
print("Hello world")
def run_script():
rl_dialog = RLPy.RUi.CreateRDialog()
rl_dialog.SetWindowTitle("Main Dialog")
pyside_dialog = wrapInstance(int(rl_dialog.GetWindow()), QtWidgets.QDialog)
pyside_dialog.setFixedWidth(200)
sample_layout = pyside_dialog.layout()
label_hello = QtWidgets.QLabel("Hello World")
button_run = QtWidgets.QPushButton("run")
button_run.clicked.connect(run)
sample_layout.addWidget(label_hello)
sample_layout.addWidget(button_run)
rl_dialog.Show()
|

定时任务
定时任务十分重要,通过开启计时,就会定时执行Timeout()内到操作
class TimerCallback(RLPy.RPyTimerCallback):
def __init__(self):
RLPy.RPyTimerCallback.__init__(self)
def Timeout(self):
print("Timeout")
timer = RLPy.RPyTimer()
timer.SetInterval(1000)
timer.SetSingleShot(False)
timer_callback = TimerCallback()
timer.RegisterPyTimerCallback(timer_callback)
def apply():
timer.Start()
def cancel():
timer.Stop()
def run_script():
rl_dialog = RLPy.RUi.CreateRDialog()
rl_dialog.SetWindowTitle("main_dialog")
pyside_dialog = wrapInstance(int(rl_dialog.GetWindow()), QtWidgets.QDialog)
pyside_dialog.setFixedWidth(200)
sample_layout = pyside_dialog.layout()
button_apply = QtWidgets.QPushButton("Apply")
button_apply.clicked.connect(apply)
button_cancel = QtWidgets.QPushButton("Cancel")
button_cancel.clicked.connect(cancel)
sample_layout.addWidget(button_apply)
sample_layout.addWidget(button_cancel)
rl_dialog.Show()
|
导出当前模型
官网甚至还在用iClone7的老东西误导你,太可恶了!
def export():
all_avatars = RLPy.RScene.GetAvatars(RLPy.EAvatarType_All)
avatar_name = None
for _iter_avatar in all_avatars:
avatar_name = _iter_avatar.GetName()
avatar = RLPy.RScene.FindObject(RLPy.EObjectType_Avatar, avatar_name)
export_option = RLPy.EExportFbxOptions__None
export_option2 = RLPy.EExportFbxOptions2__None
export_option3 = RLPy.EExportFbxOptions3__None
export_option = export_option | RLPy.EExportFbxOptions_AutoSkinRigidMesh
export_option2 = export_option2 | RLPy.EExportFbxOptions2_ResetBoneScale
original_size = RLPy.EExportTextureSize_Original
default_format = RLPy.EExportTextureFormat_Default
setting = RLPy.RExportFbxSetting()
setting.SetOption(export_option)
setting.SetOption2(export_option2)
setting.SetOption3(export_option3)
setting.SetTextureSize(original_size)
setting.SetTextureFormat(default_format)
setting.EnableExportMotion(True)
setting.SetExportMotionFps(RLRy.RFps(60))
result = RLPy.RFileIO.ExportFbxFile(avatar, f"D://Art/man/{file_name}.fbx", setting)
if(result):
print("Success export fbx")
else:
print("Export error")
|


